Monday, August 15, 2016
5 Things you should know about running in the heat
1. It's hot!
2. If you live in a location with humidity expect the heat to feel oppressive.
3. Drink a lot of water before and after.
4. Plan to run at a slower pace than you usually might.
5. Hope that you don't die and praise your deity if you survive.
I experienced all of these at a recent 5k race called 811. It was held at 8:11am on a bright sunny day with the temp already at 87 and the humidity at 66%. You know it's going to be a battle race when you are standing at the start line in the shade looking up at the hill you have to run at the beginning of the race and you already have back sweat.
There were hills at the beginning, middle and to my utmost joy a hill at the end. The last mile was a gradual uphill all with no shade. By the end I was disappointed in my poor time and not one inch of my body wasn't covered in sweat. Oh and I felt both dizzy and nauseas at the same time. I believe everyone was running a little slower than normal that day. My positive thought for that race was that the overall female winner was a 14 y/o taller than me and came in at 21 min. Therefore I was only 7 min. slower than a 14 y/o. Woohoo! Cause to celebrate. The rest of my stats were as follows: overall place was 151/536, 17/100 in my age group, and 51/323 overall females. Note to self- never run a race in SC outside in the summer!
Wednesday, August 10, 2016
The Racing Wall Project
I kept noticing on my Facebook feeds that there were companies that made plaques to hold your race bibs and ribbons. I ended up thinking that it might be nice to have one to hang my ribbons on versus their current place (hooked over a dining room chair). Of course I didn't want to pay $40 for these plaques so I set out to make my own.
I headed to Michael's with a 40% of coupon and found a wooden plaque to use as the foundation. There was many more choices than I had anticipated and originally I didn't think I'd want one to hang my racing bibs so I opted for a small square. I also wanted a somewhat rustic look. I'm not sure the end product is exactly what I wanted but it will work for now. I painted the plaque grey and then Caribbean blue over it. I used sandpaper to give it a distressed look and then painted a quote on the top. I used metal hooks that I already had a package of in my tool tote, predrilled holes and then put the hooks in.
Total time invested about 1.5 hours. Total cost invested $4.50. I'm not sure the end product is exactly what I wanted but it will work for now. If I had to do it over again I would use a bigger board and use stencils to write the quote. This would make things less crowded and half of the board could hold bibs and the other could hold many more medals then what this one can.
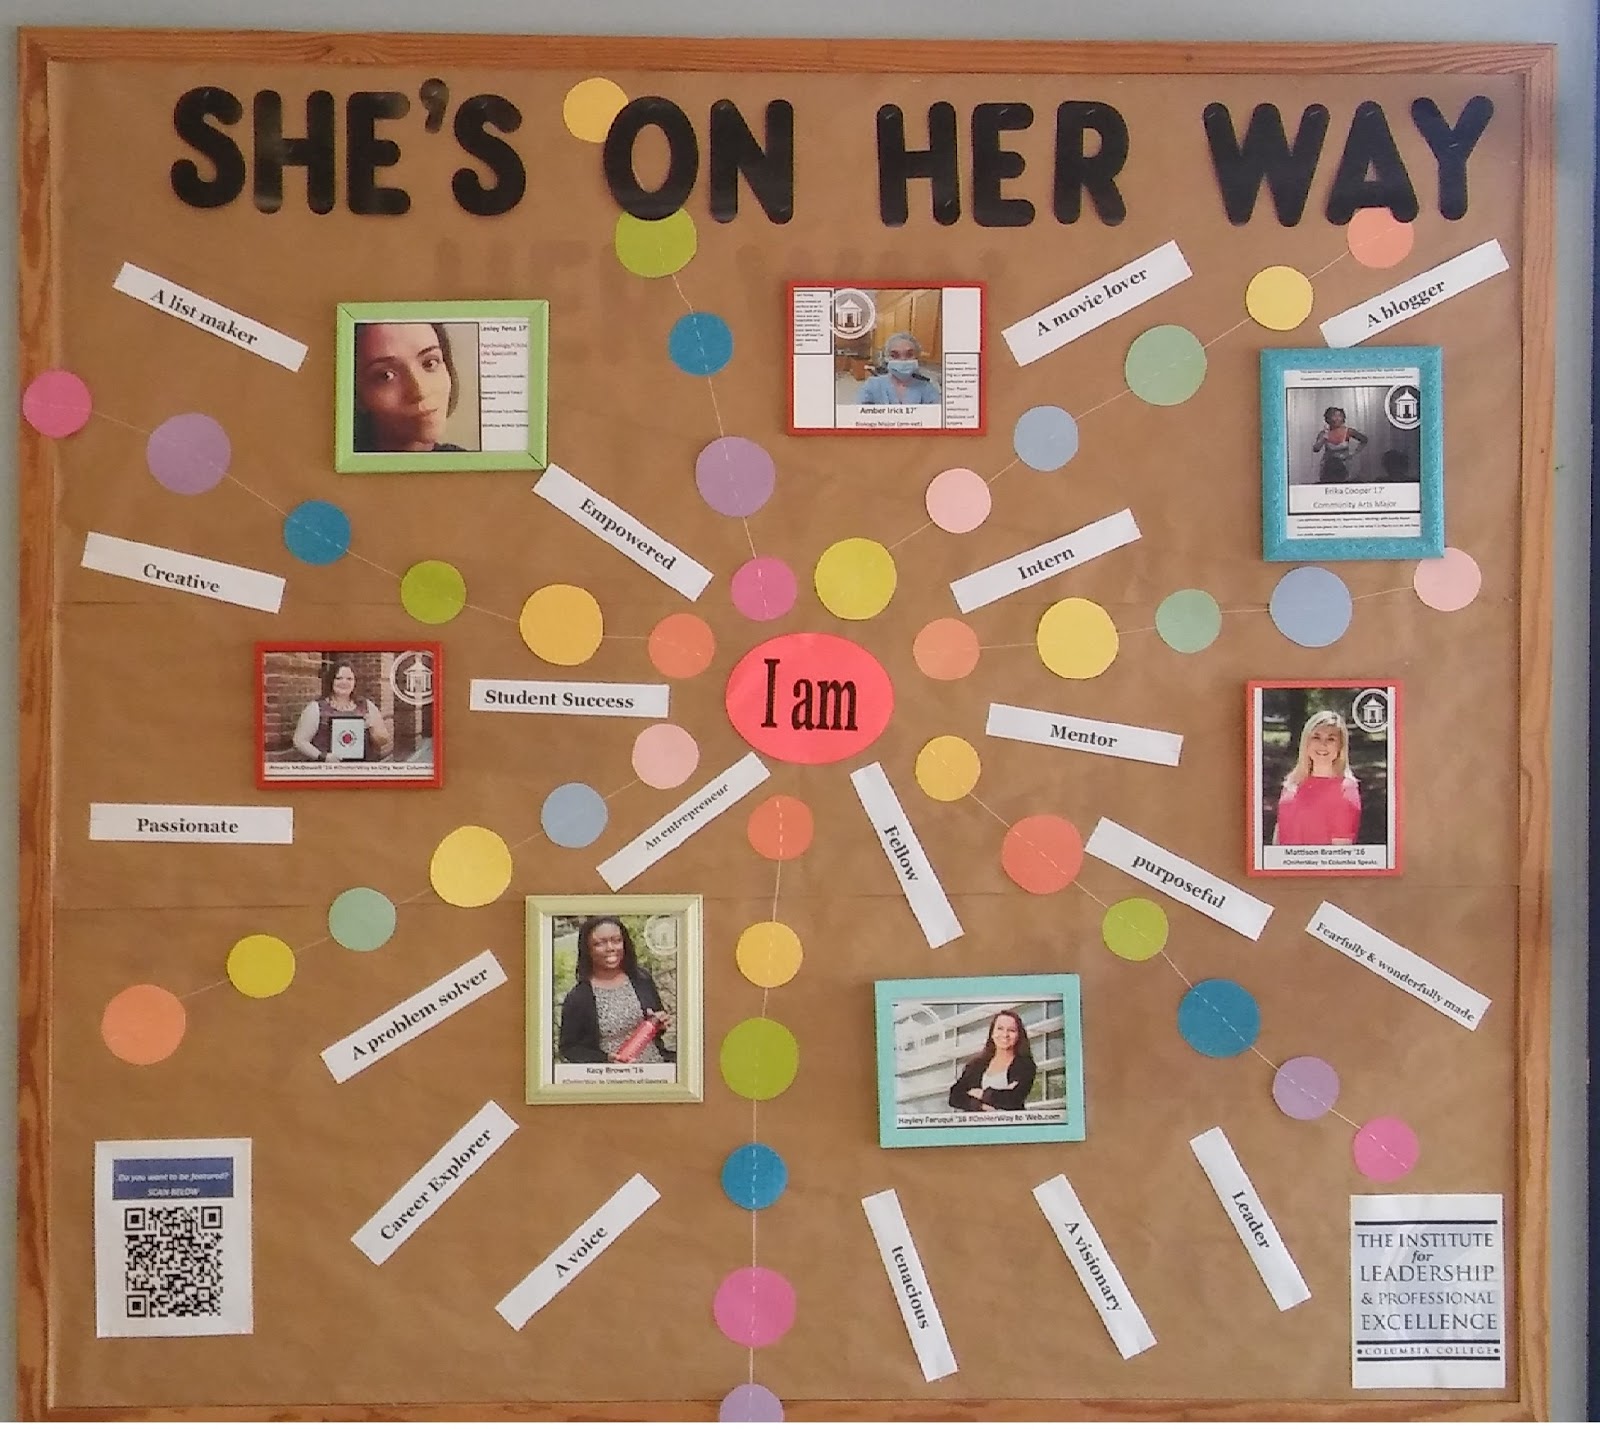
How to create an attractive board on 0 budget...
One of my first task at my new job was to spruce up this informational board on our campus that is suppose to display the Institute student accomplishments that I work within. HOWEVER; I was told that there was no money to do this with...
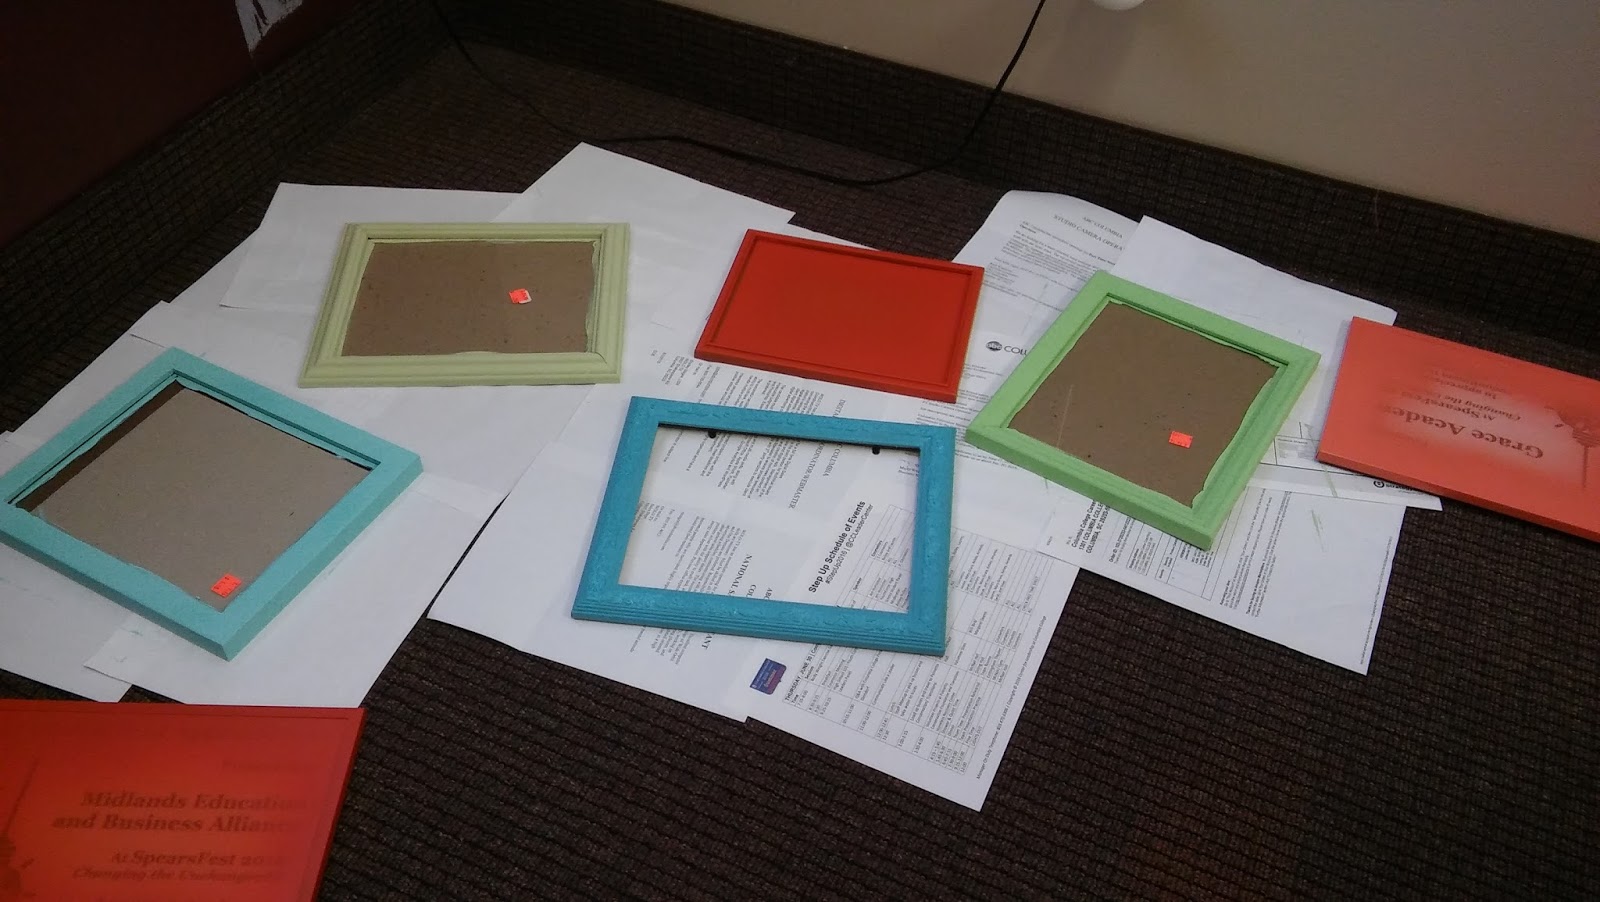
This is what I ended up doing...I had a lot of scrap paper so I spent a couple of hours drawing and cutting circles. Then I attached them together using a large needle and embroidery thread to create chains. I knew I wanted to use different texture/designed frames and paint them bright colors as a way to show off our students but I didn't know how I was going to do this with no funds. I asked around and was able to acquire 3 frames from different programs through the Institute but still needed at least 4 more. I headed to a local Thrift store and found a couple of totes full of frames in various conditions. While I wanted textured and different shape frames I didn't quite end up with this. There was some available but they cost more then I was willing to personally invest out of my pocket. I found 4 frames for $3.75 but when I got to the check out counter the cashier gave them all to me for $1.60! What a steal!! I used left over spray paint and paints that I had around my home to paint the frames. Once I had all of the pieces put together I went over and put the board together. Turned out pretty fantastic for $1.60!
This is the old board. It had looked like this for at least a year.
Tuesday, July 19, 2016
The Bubble 5k Race
The Bubble 5k race came to my city this past weekend. I was set to run it alone and then 3days prior to the race on a whim I was visiting my sister and asked my 9 year old nephew if he would like to run this fun race with me. I showed him the video and told him he would have to contribute half of the cost if he wanted to run ($10). He actually said yes he wanted to and so I signed him up. He ended up spending the prior night to the race with me.
I took him to the packet pick up so he could have that experience. Then we picked up some snacks, went swimming, had pizza for dinner and ice cream for dessert. Followed by some Atari competition and watching Ant Man. The morning of the race I woke him up very early and we ate breakfast, got our gear on and then headed to the race. My nephew shared that he was excited but a little nervous. I had to keep reminding him that this was just for fun. As soon as we ran through the bubbles at the start I think he let all of his anxiety of what to expect go and we both ended up having an awesome time and making great memories. Let's just saw when his mom came to pick him up later he didn't want to leave and said he was having a fun time with his Aunt. :)
My first Make-inar
I was surfing the internet trying to find affordable art therapy CEU trainings. While not successful on that front I did come across this FREE Make-inar through Inner Canvas; http://www.innercanvas.com/ which is hosted by therapist Lisa Mitchell. Here is her blog; http://www.innercanvas.com/blog/. The Make-inar she hosted last week was titled "What Matters in Psychotherapy". I will admit that by 8pm when it started in my time zone I was exhausted and unsure if I wanted to participate. It was recommended that you prepare your materials ahead of time (of which I did not do). However at 7:47pm I decided that I would participate and raced around gathering and cutting the supplies (4 pieces of 8x8 watercolor paper, water, watercolors, paintbrushes, scissors and markers).
I will say that I'm glad I participated. It was a new concept to reach out with 100 therapist and artist from around the world and watch a live presentation that included all of us making art together. While creating we listened to Lisa talk about different aspects of being a therapist and helping us to recognize what we do for others. We created a therapist guide as something tangible to remind us along the way when we are tired about why we are therapist. We just created the basics and then posted them on her Inner Canvas Facebook page. But these guidebooks are something that we can keep working on at any time. I'd like to do some of her other online trainings/workshops but even with the discount code she offered to us that evening it was still to expensive to sign up for a class at this time.
Mixed Media The Journey of the Bike
I was commissioned by a friend in my book club to create a large piece of art to replace an outdated photo in one of her rooms. I was inspired by an image she posted on Facebook of a new yellow bike she purchased. When talking with her she shared that she wasn't sure about getting a banana colored bike at her age but she felt the yearning to as she had one when she was a little girl.
Using that yellow bike as inspiration and a favorite quote of hers I created the painting below. It took about 4.5-5 hours to complete and I did it in pretty much one sitting. Well, I can't say I sat as the canvas was so large I had to stand the entire time and move around the canvas when painting it. I've been finding it thrilling to add texture to my pieces and so I used joint compound on the lower half of the painting and worked my way up to a smooth piece of canvas as the colors reached the top. Other materials used were stencils and a black charcoal pencil beyond acrylic paints. I was very pleased with the results and posted it on Facebook for feedback which ended up being very positive. Most importantly my friend loved the piece!
Labels:
acrylic paints,
charcoal pencils,
large canvas,
mixed media,
stencils,
yellow bike
Monday, June 20, 2016
Mixed Media Paintings
I finally did some painting. I was encouraged by a couple of co-workers who commissioned me to created some art for their offices. The top image is a large piece of canvas and has a ton of texture but it's really difficult to see from this picture. I used a ton of different paints, stamps, joint compound, and did some jelly printing. In addition I cut out some different sized butterflies out of paper to create templates and dipped in a plate of white paint. Then I pressed them on the canvas and rubbed them before gently peeling off the paper to real the image. This was a fun piece to create. It took a couple of nights to complete about 6 hrs.
This piece didn't take very long at all to make. About 2.5 hours. I had purchased a canvas at Michaels about a month before because it looked neat and was 60% off. The canvas was pre-printed with the writing on it and cost only about $5 or 6 dollars. Then I used Alcohol Inks, gauze (new but left over from my surgery), cotton balls, rubbing alcohol, stamps and permanent markers to create this piece. I was recovering from a painful surgery and was weaning myself off the medication and trying to not be depressed about feeling miserable. Since I couldn't sleep much during this time I spent time creating.
This piece I created before the other two. I had been wanting something for my front door for spring/summer time but didn't want to spend a lot of money. I went to Michaels and found this US wooden plaque and it was reduced to $4 or 5 dollars. I brought it home and painted this in about an hour and now it's been hanging on my front door. Brightens up my home.
Labels:
alcohol inks,
ink,
joint compound,
mixed media art,
paints,
permanent marker,
stamps,
stencils
Subscribe to:
Posts (Atom)