Search This Blog

Creative Casey's Blog

Showing posts with label salvaged art. Show all posts

Wednesday, April 4, 2012

Inexpensive Wall Decoration


The concept of this project began with a group directive I facilitated. The directive was to think of your life motto/inspiration that has helped you. I began by creating an image of a hanging quilt inside of a large vintage wood frame with a quote on the quilt. This image eventually led to this project. From inception to completion it took me about a month.

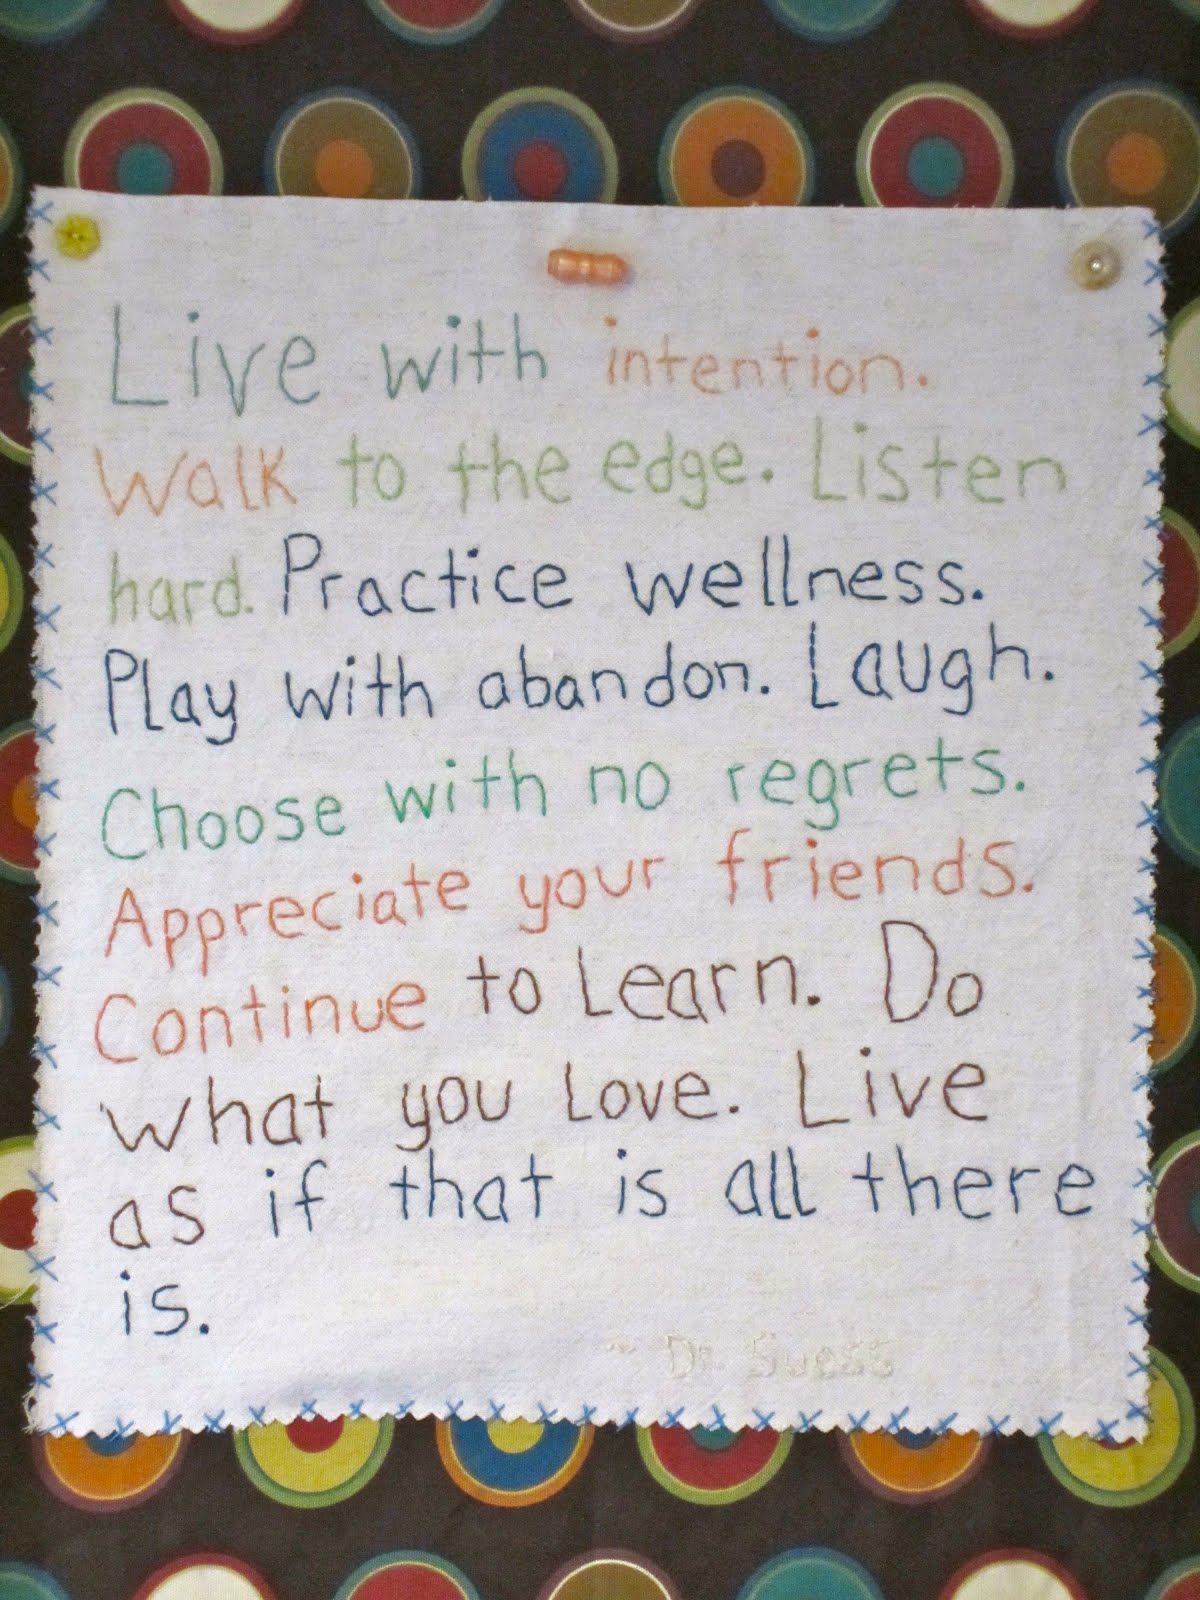
I first found a very old very large wooden screen frame from my 1930 home that I found in my garage. I tore the screen out, took the hardware off, filled holes and began painting. I've been looking for a piece for my bedroom in the sitting area. I decided to use a color that would bring out the blue accent wall that my bed frame is against (so I used the same color paint as the accent wall). On a visit to Craft Bits and Pieces I found this remnant material for .25 cents and the off white piece for .25 cents. I got some vintage buttons for .50 cents. I came home found this quote by Dr. Suess that I liked and embroidered it on the off white cloth and zig zagged stitched the off white piece to the larger fabric. The original wood frame was about 4.5 feet tall and 3 feet wide. As a result the main fabric wasn't tall enough so I sewed on some vintage looking decorative fabric to the top and bottom. I already had doubts about if this would look good but went with it. To finish the piece I used a hefty stapler and stapled the fabric to the back of the wood frame.

OUTCOME: didn't like it! The frame was to big and with the added fabric it didn't look good. So I was frustrated and let it sit for at least a week. Eventually when I tackled it again I took another old smaller screen frame from the garage and repeated the above process. I had to rip the fabric off the original frame, cut it down since the new frame is about 3 feet tall by 2 feet wide, and re-staple. OUTCOME: Much better! Better enough to actually put a hanger on the back and hang it in the intended location. Total price of entire project $2!


Saturday, May 7, 2011

Salvaged Art


I orignally began creating this piece for an art exhibit for staff and faculty to show case their artwork at the local college I work at. This is an annual art exhibit and the first one I've participated in. Talk about interesting- there was artwork that was amazing from many different professions and a myriad of art materials.

I wanted to create something from a piece of salvaged art and photographs I've taken from trips over my life time. It just so happened that I've been looking for a piece of artwork to hang over my bed for 2 years now and that is where this piece ended up finding a home after the exhibit.

We have a couple of unique salvage shops in our city and I while I usually enjoy a good garbage picking find, it was winter here and that's not a fun garbage picking time, therefore I ended up perusing the shops.

Historic House Parts: www.historichouseparts.com
ReHouse Architectural Salvage: www.ReHouse.com

I found this cabinet door with all all hardware on it for under twenty dollars. It was painted a horrible peachy color when I found it but I liked the 4 seperate glass panels all being framed in. An idea began to form of putting photographs in each panel. I love black and white prints and went through photoshopping pictures from trips. I sent them to http://www.scottsphoto.com/ which I love because they do great work! I painted the frame black then did a weathering glaze followed by a coat of off white paint. I took the hinges off and spray painted them black. The tricky part that took hours of experimenting was how to adhere the photographs. I ended up using scrap-booking photo corners on each photo and then very carefully and patiently putting a dab of super glue on each corner of the scrap-booking edges (not the actual photo). I measured first and then placed thick books on top of the back of each photo to help them adhere. I was planning to hang the artwork from the hinges but this didn't work out so I purchased frame hooks and hammered them into the back. I then went to a local craft store and purchased etching scripts (the words in black on each panel). I carefully cut the scripts, placed them on the front and using an etching stick adhered them onto the glass.

The outcome turned out lovely and fits in my room perfectly. The art exhibit went well and I received many compliments. My goal is to participate in it next year to help me to keep creating!